Sooner or later your washing machine will fail. So either you she’ll out another $700 to replace it or read this blog and spend $50 to replace bearings.
So my washing machine was making a horribly loud noise for several months. I knew there was a problem, but heck, it still cleaned my clothes, so I ignored it.
Problems that are ignored always get worse. So this blog is how to replace my bearings which were the cause of my washing machine noise.

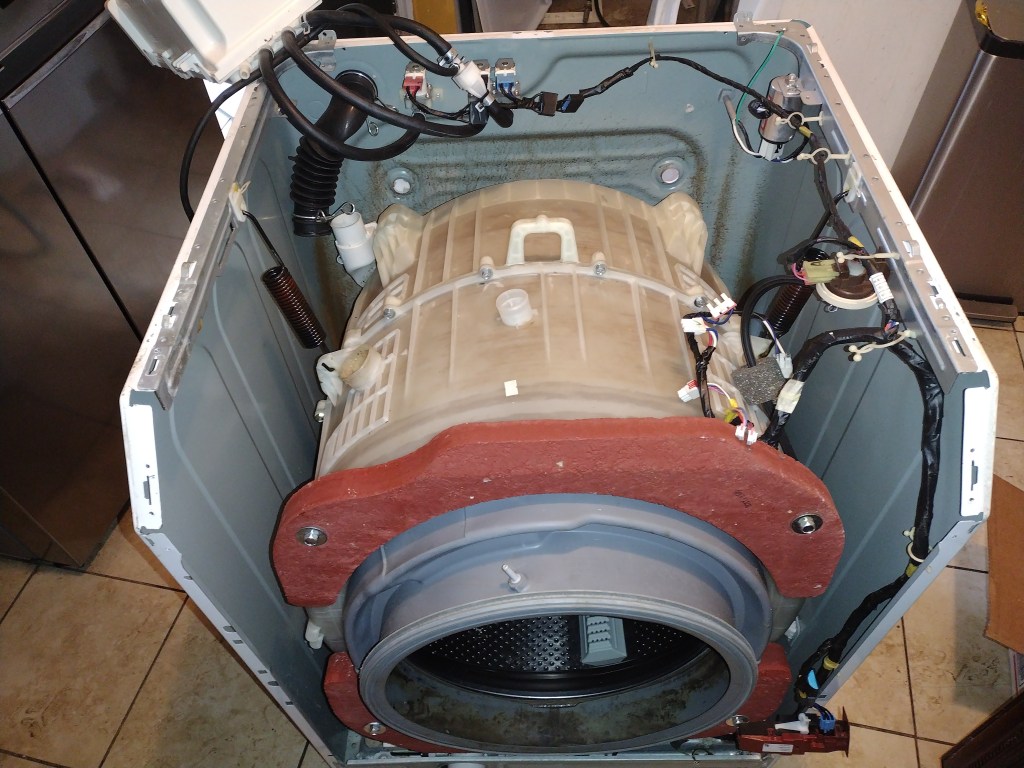
This is my washing machine. The model number is Kenmore 402.49032011. Don’t get too weirded out. Most front loaders irregardless of the brand are build the same. Not identical, but very similar. So changing the bearings will be a similar process no matter what model you have.
This is it. You have to remove the tub from the unit. No if and or buts. If you have no mechanical intelligence I probably would stop reading this and Google a technician.
These are the steps:
– Remove covers
-look at your tub, remove hoses and electrical connectors that prevent it from being removed from unit. Take pics, if needed of every hose clamp and electrical connector.

Next step is to remove the bottom struts. Don’t worry your tub won’t drop. Be sure to leave one end connected to tub. Just remove end connected to cabinet.
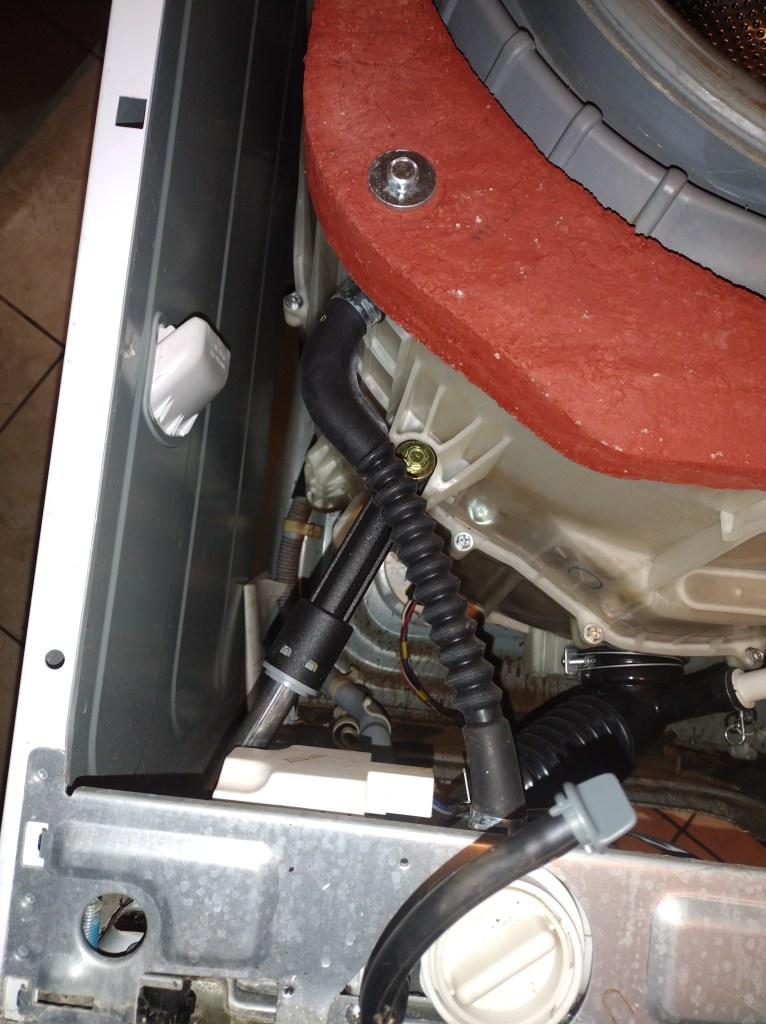
Ok. This next step is important. Be sure your tub is free from all hoses, connectors and struts. Your tub should be held by two springs. You will probably need a hand for this. As you lift the weight off of the tub, have someone detach the spring from the cabinet. Now the tub can be removed from the cabinet.
Now that the tub is removed locate the bolts that are around the circumference of the tub. Remove all of them.


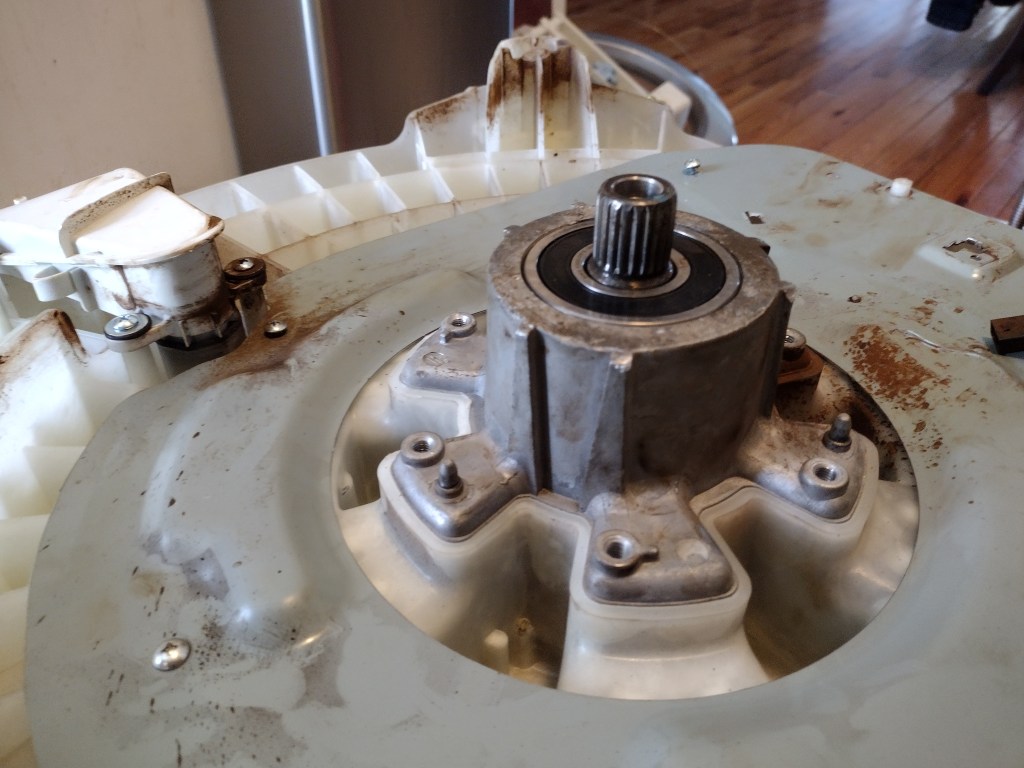
Separate the upper half from the lower half. Locate the bearings. They are probably visibly destroyed, maybe the balls are exposed.
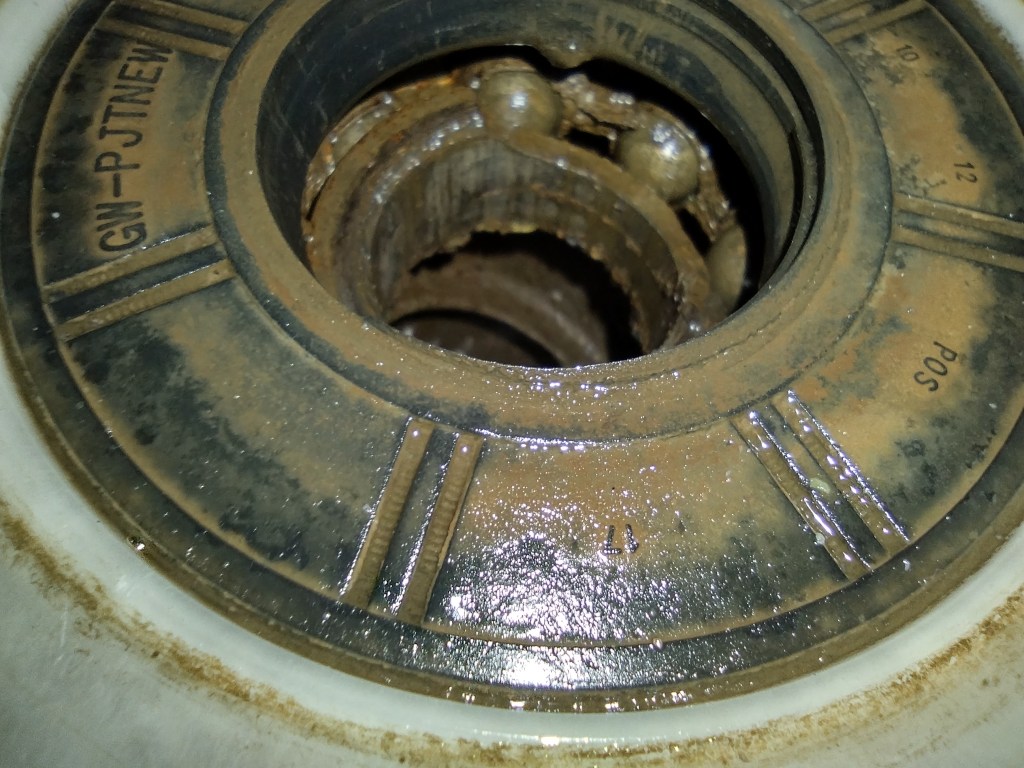
Remove seal, with hammer and punch, remove the bearings. Be sure to remove both of them. Clean up dirt and grim as needed.
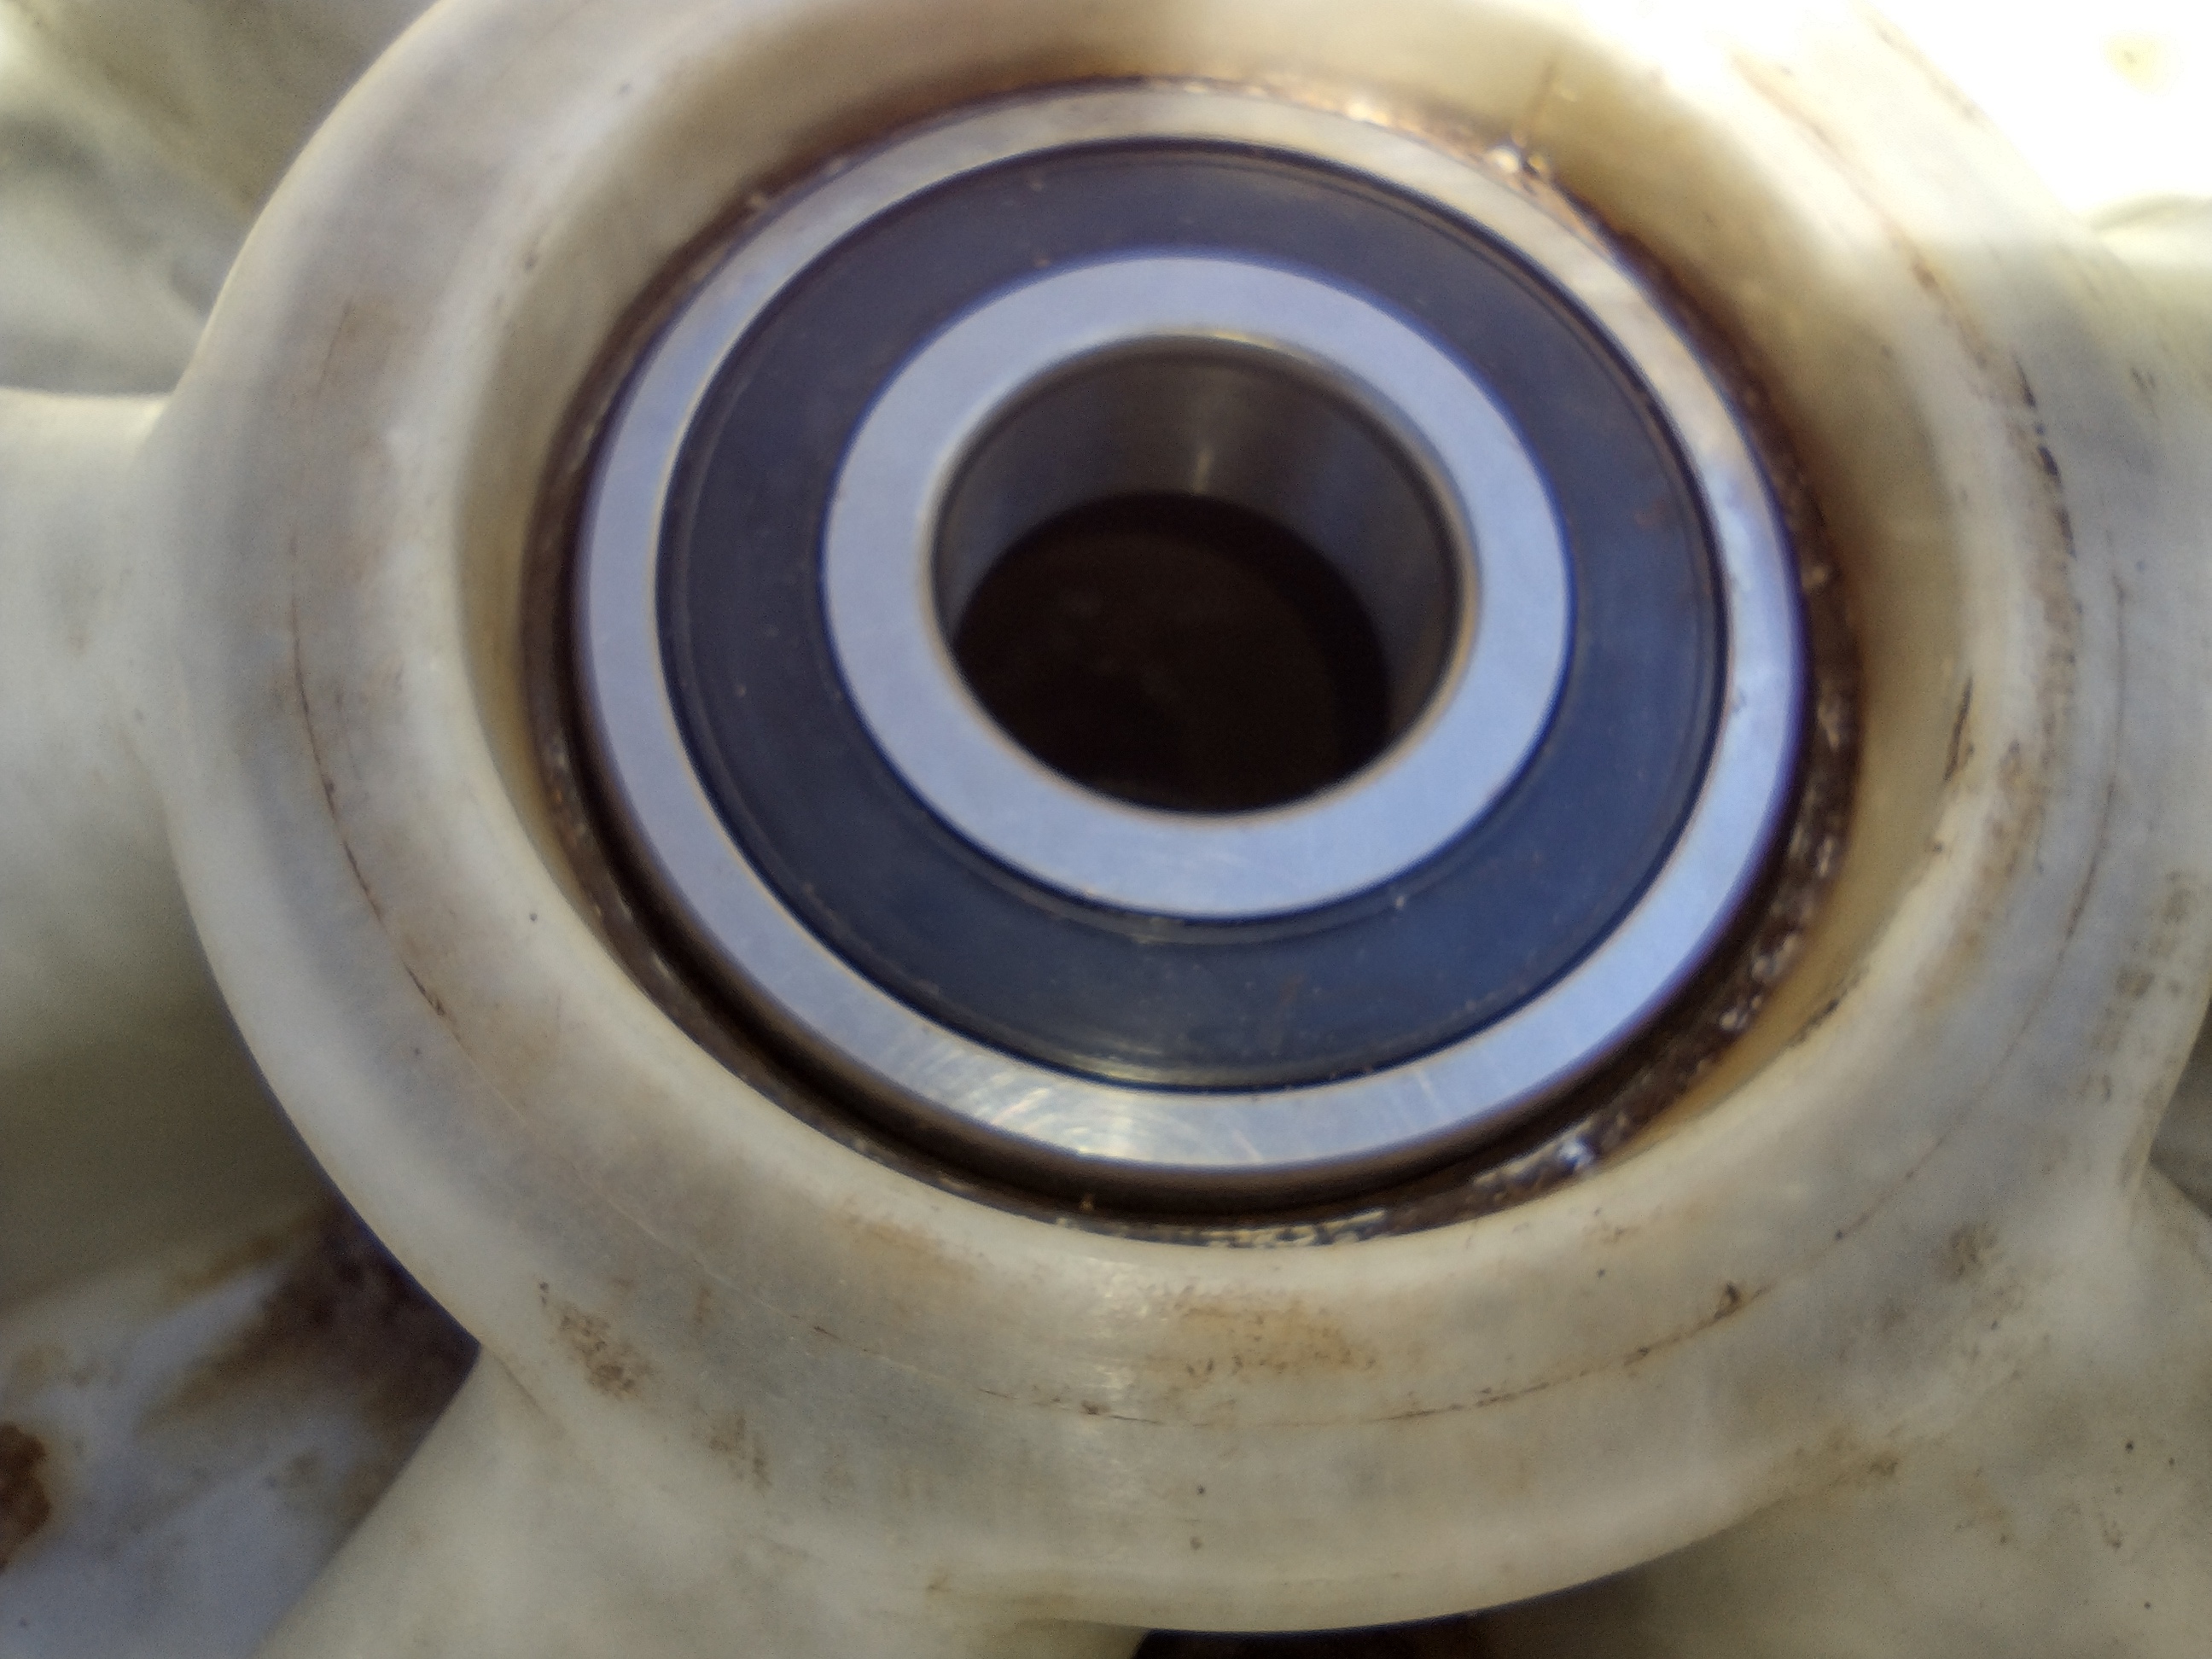
Critical step…After you order new bearings, they need to be properly installed. Never ever ever hit them on the inner race. They should be hit in on the outer race or find some sort of plate to hit the entire bearing in.

So you have done it. You installed the bearings. To reassemble, just perform the disassembly steps in reverse. Hopefully this blog set you in the right mindset. Of course you should look at YouTube videos of others who have performed the job. I just want to give you the confidence, so you know anyone can do this. Cheers……