When my 55-inch LED tv went black, I brought it to the basement with the intention that one day I will fix it. A year later, I finally got around to it. This article is about that experience.
Before my tv finally conked out, I would be able to smack the back of it to get it to work. It would work for hours or even days. Then out of nowhere, it would lose the picture. I figured, there was a loose connection somewhere. I removed the back cover to inspect, nothing obvious.

With the help of YOUTUBE sites bigdog and shopjimmy, I was guided towards what the possible problem might be.
Backlights
I learned that my backlights (LEDs) are the probable cause.
Without a backlight, the image produced by the tv would not be visible. To verify, take a flashlight and put it against the screen, you should be able to see an image. Another sign that your LEDs are malfunctioning, After powering the tv on, the backlights will flash on then back off. These are signs that you have backlight LED problems.
LEDS
An LED tv uses strips of LEDS to produce light. The number of LEDs for each TV varies by size. My 55-inch tv has 5 rows of 9 LEDs (see circuit below). Each strip needs 38volts to activate. The circuit that powers the LED strips is integrated within the main power supply board.
Every LED strip is a series circuit. Hence if one LED in that strip is open then the entire strip will not light. If one strip goes out, that will result in the current increasing for the other strips. To prevent damage, your tv shuts down the entire backlight circuit.

Test voltage
Before disassembling, check voltage at the connector. To identify which cable is for the LEDs follow the black cable that routes into the chassis. Also, read the connector labels, My connector reads +Vled and -Vled.
When my circuit is working properly, all +Vled should read 38volts. With 38v at the connector, the LED strip should be illuminated. If it is not, proceed to disassemble the tv to gain access to the LED strips.
If an LED strip is bad, you will measure 38volts when powered on, then the voltage will gradually decrease.


Remove the screen
To access the backlights, you have to separate the front screen from the chassis. Refer to shop jimmy and bigdog, they have lots of videos and tutorials on this topic.
Test LED STRIPS
Now that you have your tv separated, your LED strips are exposed.
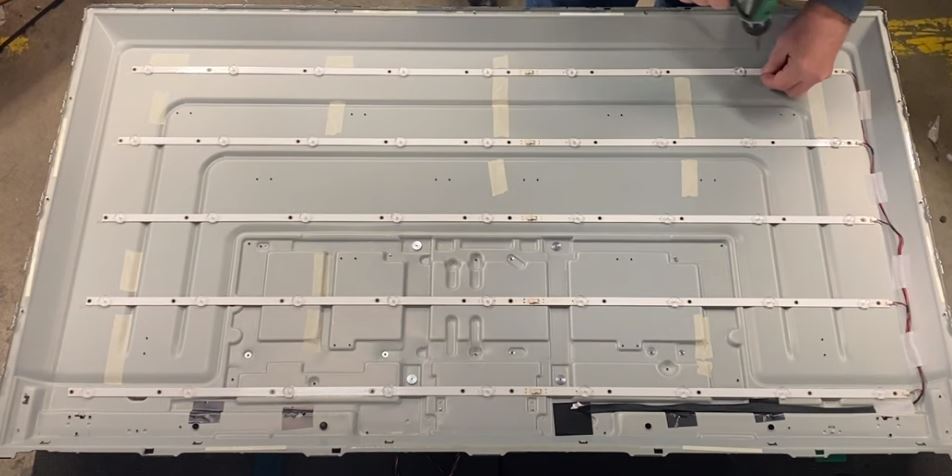
There is an invaluable tool available called a LED backlight tester. It allows you to quickly apply voltage to the connector, individual strips or individual LED. It generates the proper voltage to test those components. There are various models available , usually less than $40. I used it to test each strip and narrow down to which one was defective.

With the LEDs illuminated, I pressed and shook the connector. What I found was a loose connection, between two strips. To fix it, I unscrewed and removed the strip from the base, then connected it back, making sure the connection was tight before securing hardware.
See schematic of LED strip in failed state.

Conclusion
Back to the title of the article. “How to break a Television“. Separating and removing the layers of the TV takes, time, patience, and a few special tools. While separating the liquid crystal layer, I cracked it. The professionals use a special suction cup to lift the liquid crystal screen from the stack. I did not buy one, I cut corners and tried to slide the screen, instead of lifting it. No good – CRACK! I fixed the original problem, then created another. Lesson learned.

The moral of my story, troubleshooting and repairing this common TV failure is doable, just take your time, look at a few videos and purchase a few inexpensive tools.